User Interface Overview
Thanks for installing Pihasa Assistant! You’ll find it makes it easy for engineering teams to manage projects and calculations so that you can focus on what matters–building better products.
In this article we will cover:
Main Screen
The following figure shows Pihasa Assistant main screen.
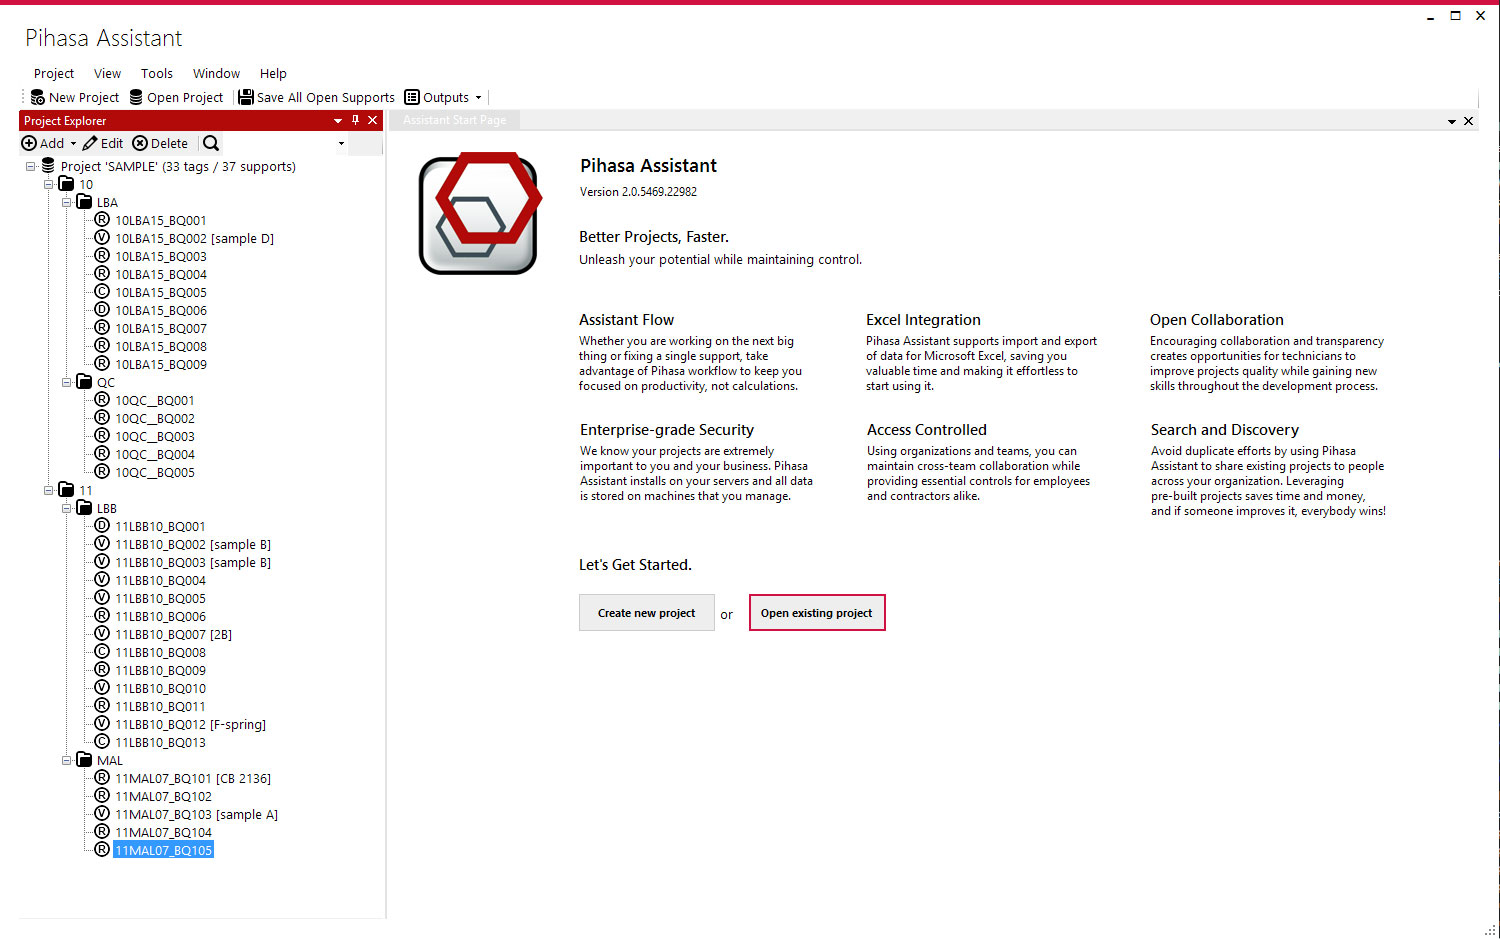
Menus and Toolbars
These controls appear in the upper area of the main screen.

The main menu includes several options. The toolbar includes common actions for easy access.
Project Explorer
The Project Explorer is the navigation area.
Once a project is opened, here you’ll find the project organisation. Each
 project is organized into
 folders (and subfolders). Every folder
represents a unit or a system in your plant.
folders (and subfolders). Every folder
represents a unit or a system in your plant.
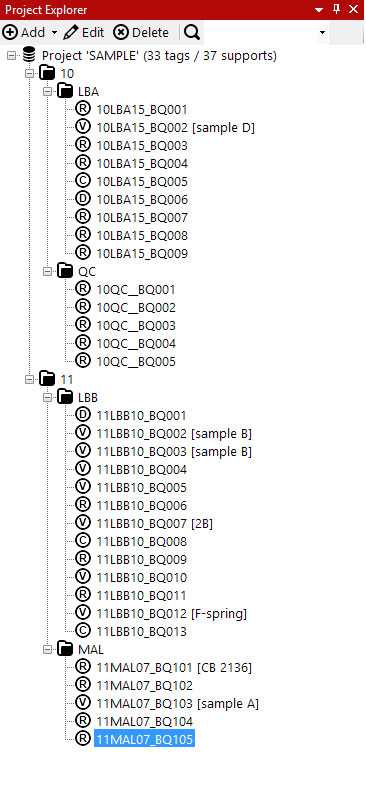
Supports are organised into folders and depending on its type, icon is different:
 stands for V(ariable) Supports
 stands for C(onstant) Supports
 stands for R(igid) Supports: Hangers,
U-Bolts, Shoes and Sliding plates.
stands for R(igid) Supports: Hangers,
U-Bolts, Shoes and Sliding plates. stands for D(ynamic) Supports: Struts,
Snubbers
stands for D(ynamic) Supports: Struts,
Snubbers
Note: Use the Explorer toolbar or right-click an item to show and execute actions.
Working Area
The software supports a multi-tabbed interface allowing you to arrange support sheets into multiple tabs. Each support datasheet or drawing is opened in a new tab.
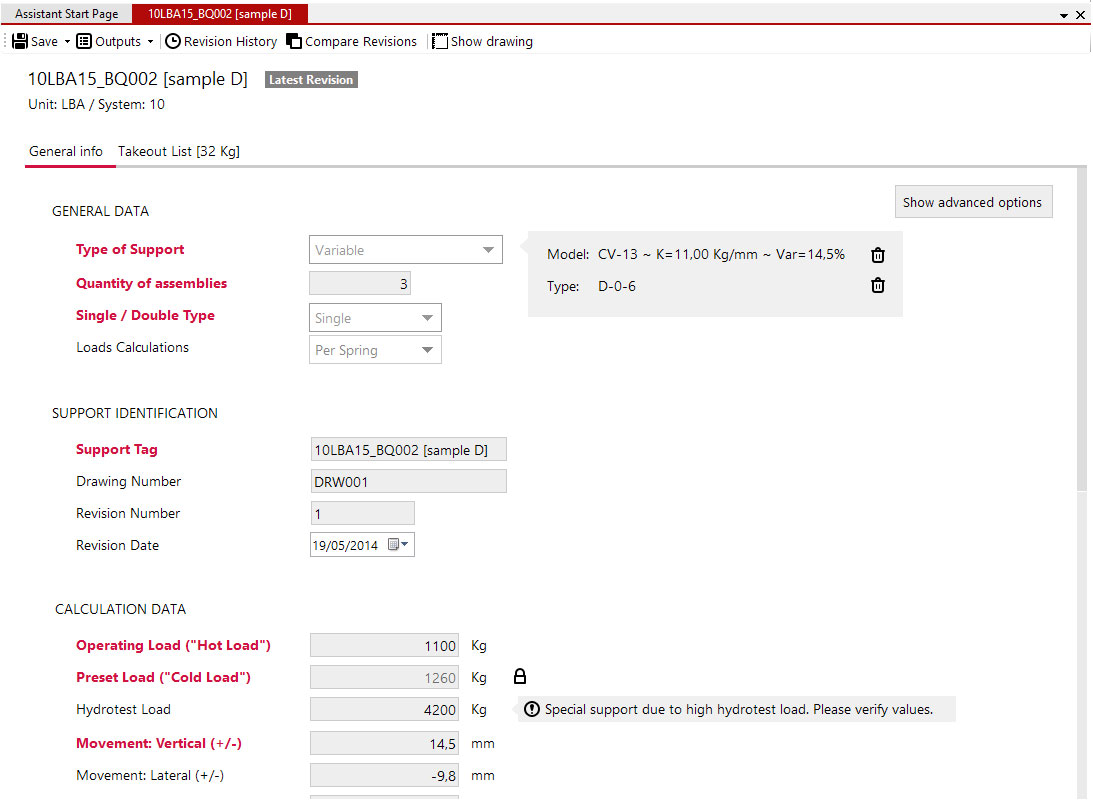
If you click the ‘Close’ button in the upper-right corner of Pihasa Assistant working area, you will close the tab you’re currently viewing. You can also close a tab or a group of tabs using the menus or toolbar (as mentioned before).
Still need help?
Have more questions? Contact Pihasa and the support team will get back to you as soon as possible.